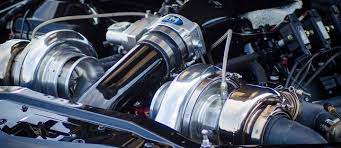
Replacing a turbocharger can be a daunting task, but with some know-how and a few tools, it’s one that you can do yourself. While it’s always recommended that you seek the help of a professional auto mechanic, doing a turbocharger replacement on your own can save you some money in the process.
In this blog, we’ll provide you with some tips and tricks to ensure a successful DIY turbocharger replacement.
Is DIY Turbocharger Replacement Safe for Your Vehicle?
When it comes to replacing a turbocharger on your car, the question of safety is a valid concern. While do-it-yourself (DIY) projects can save you money, proper knowledge and tools are necessary to ensure a safe and successful replacement. It’s important to research and follow manufacturer instructions, as well as any additional advice from experienced professionals.
Taking shortcuts or using improper techniques can result in significant damage to your vehicle and potentially put you and others in danger on the road. In the end, if you do not possess the necessary skills and knowledge, it may be best to leave this particular repair to the professionals.
Tips and Tricks for a Successful Installation of Turbocharger
Tip 1:
Take Your Time. Replacing a turbocharger is not easy and can be quite time-consuming. Rushing through the process may cause mistakes that could lead to further damage to your vehicle. Take your time, read the manual, and follow the instructions step-by-step to ensure everything is done correctly.
Tip 2:
Use High-Quality Parts. It’s important to use high-quality parts when replacing your turbocharger. Avoid using cheap knock-offs, as the quality may not be up to par, leading to problems down the road. Keep in mind that investing in quality parts now can save you a lot of time and money in the long run.
Tip 3
Cleanliness is Key. When working on your turbocharger, it’s important to keep everything clean and free of debris. Make sure to clean any surfaces where the new parts will be installed, as even a small amount of dust could cause damage to the new turbocharger. Additionally, it’s recommended to wear gloves to avoid spilling oil or other fluids.
Tip 4
Use the Right Tools. Having the right tools is essential when working on your turbocharger. Some specific tools you’ll need include a torque wrench, socket sets, pliers, and screwdrivers. Make sure to have all the necessary tools before starting the replacement process, as not having them can delay the installation.
Tip 5
Double-Check Everything. Once you’ve finished installing the new turbocharger, it’s important to double-check everything. Make sure all connections are tight and secure and all hoses and lines are correctly attached. Additionally, it’s recommended to check the oil levels before starting the engine.
Conclusion
Replacing a turbocharger can seem daunting, but with the right tools and know-how, it’s something you can do yourself. Take your time, use quality parts, keep everything clean, and double-check your work to ensure a successful DIY replacement. Remember, it’s always recommended to seek the help of a professional auto mechanic, but doing it yourself can save you some money. With these tips and tricks, you’ll be well on your way to a successful turbocharger replacement.